I also went to the local garden centre and bought a small piece of decking approx 18 square. Lastly looking and feeling like an idiot I asked the young assistant if they had any “old” wood off cuts I could purchase.After staring at me with a quizzical look he pointed me to a rubbish area and grunted look there. I rummaged through rubbish old wood, feeling like a tramp and seriously trying to contain my embarrassment as the young lad starred at me in disbelief probably thinking I was eccentric. I managed to retrieve three battered pieces which looked like old fencing. They were truly weathered from the rain and were covered in sticky tree sap in places but looked really rustic. Armed with my find I was really excited to get home to venture on my new project but before I could do that I had to pick up some painting supplies.
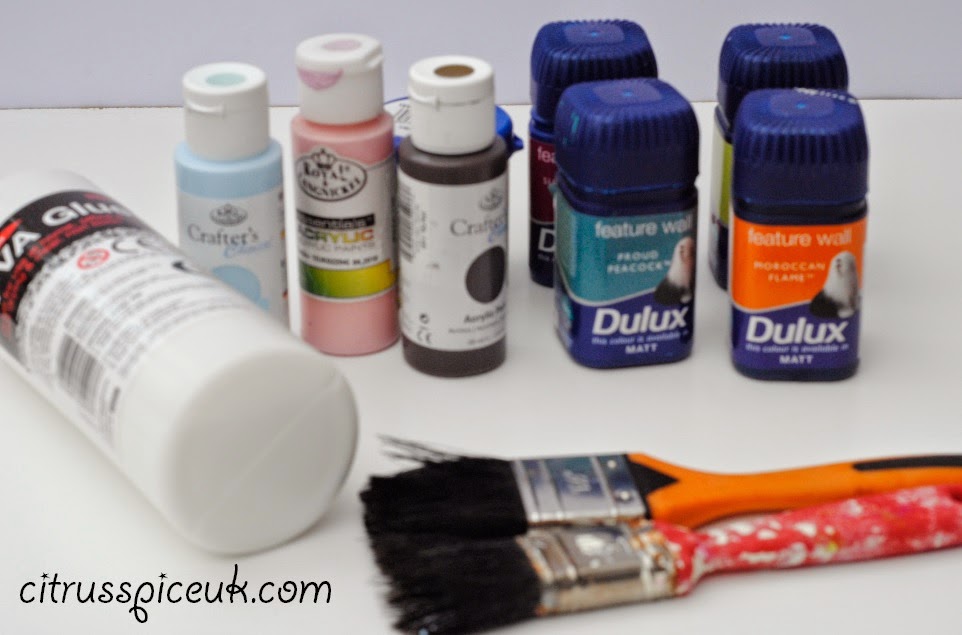
My next stop was a paint shop,I bought some mini emulsion sample paint pots, some small acrylic paints, some pva glue, wire wool, sand paper and some in expensive brushes. I was excited as my project was finally going to commence. All these supplies will enable me to create some different finishes, today I am going to share my first project of creating cracked finish wooden boards, I hope to share more tutorials using my purchases above in later posts.
Project one- Cracked finished wooden boards.
Materials:
Two small plywood boards ( any size of your choice)
PVA glue
Acrylic paint (light pink) ( light blue for blue board)
Dulux emulsion paint sample pots (dark pink) (Dark blue for blue board)
2 paint brushes
2 old rags (old T shirt cut into squares )
Bin liner
Sand paper
Hair Dryer
Method:
1.Open out the bin liner and put it on the table so that you don’t mess up your table.
2.Sand any rough edges from the wood so that you don’t get splinters from it.
3. Damp one of the rags with water and wipe the wooden board to clean off any dust.
Step 4 Step 6 Step 7
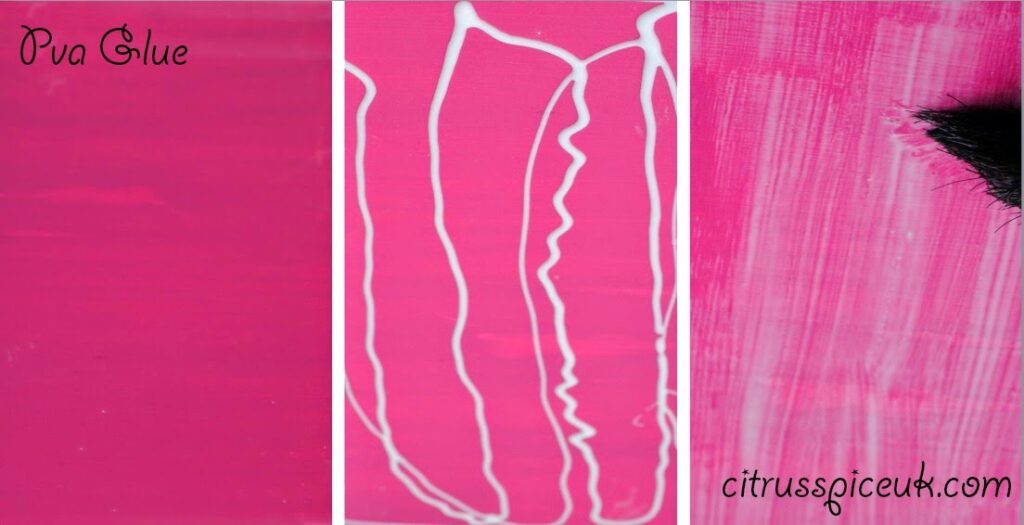
4. Paint the wooden board with your base colour which should be darker than the top colour so that when
we put the lighter colour on top the darker colour will show through from underneath.
5. Leave the board to dry totally and wash your brush and dry it on the second rag.
6. Once the board is dry, we are going to paint it with the pva glue. This stage is important as you must choose which direction you want your cracks to form and paint the pva glue in that direction only.
7. The amount of glue you paint on the wood will determine the size of the cracked finish. For a lighter crack finish paint a thin layer of glue, for larger more prominent crack finish paint thicker layer of glue but remember always paint the glue in one direction.
Step 8 Step 10
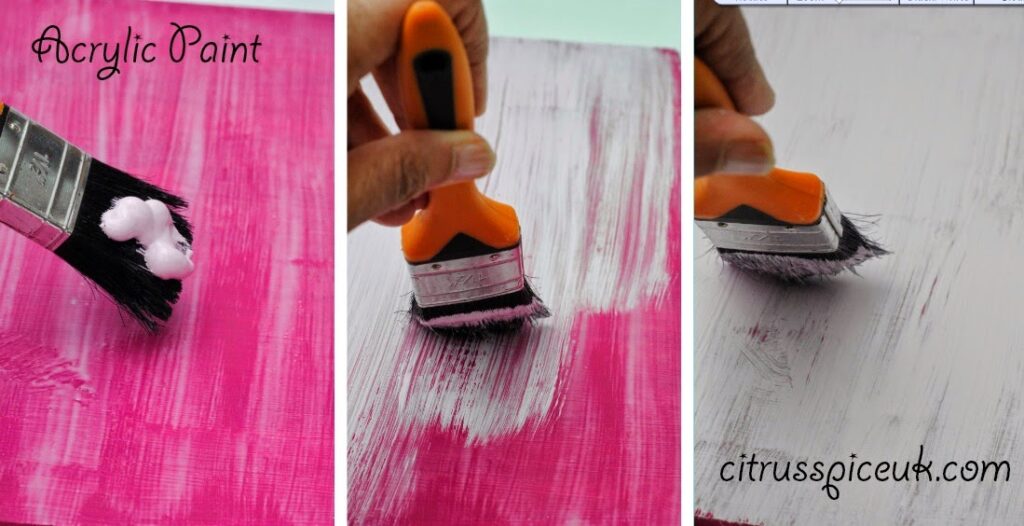
8. Immediately on top of the wet glue with a clean brush paint a thin layer of your acrylic paint. Take care to paint it lightly with gentle strokes as not to lift the glue off and also paint in the same direction .
9. You don’t have to be too careful with the painting, you get a better finish if you get some odd patches and the final finish will be more natural.
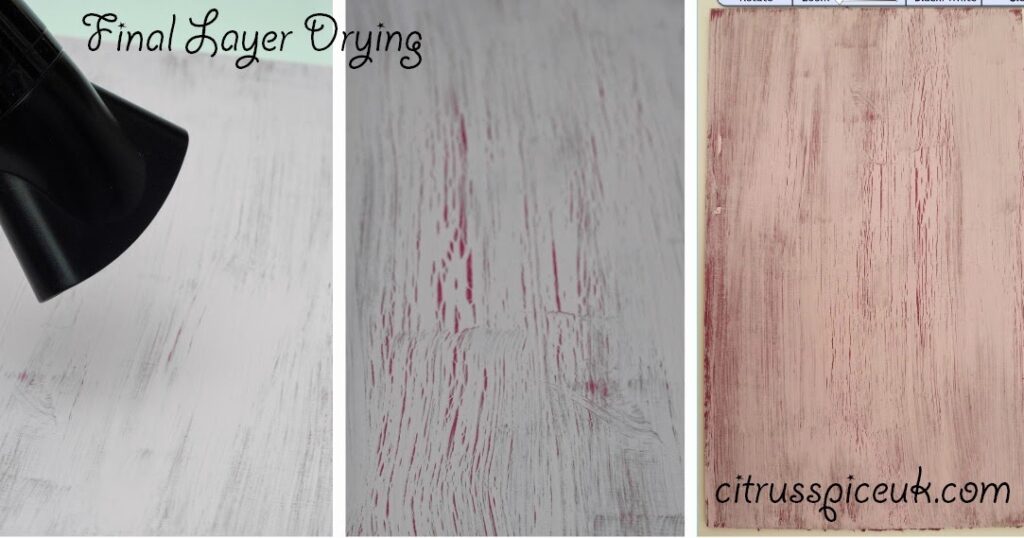
10. Once the acrylic paint is on the wood, immediately dry the paint on the wooden board with the hair dryer or heat gun. The hot heat will dry the paint and as its drying you will see cracks appearing in the painted surface.
Step 11
11. Once the paint is semi dry leave the board to air dry for another 24 hours before using it.
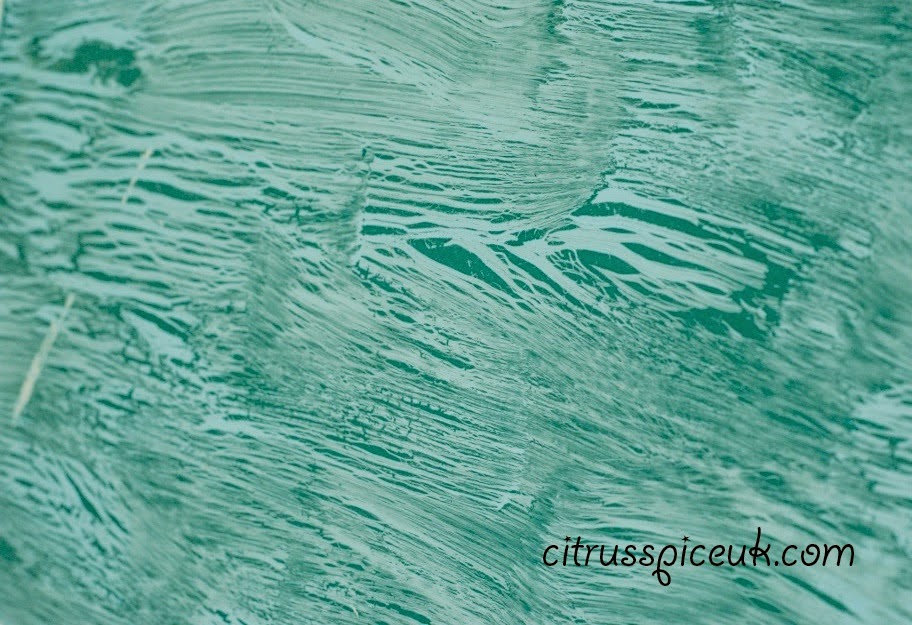
You can see I created a blue board and a pink board. The cracking on the blue board is more definite as I had painted a thicker layer of glue and I had also painted the glue diagonally and with random brush strokes to change the pattern of the cracking.
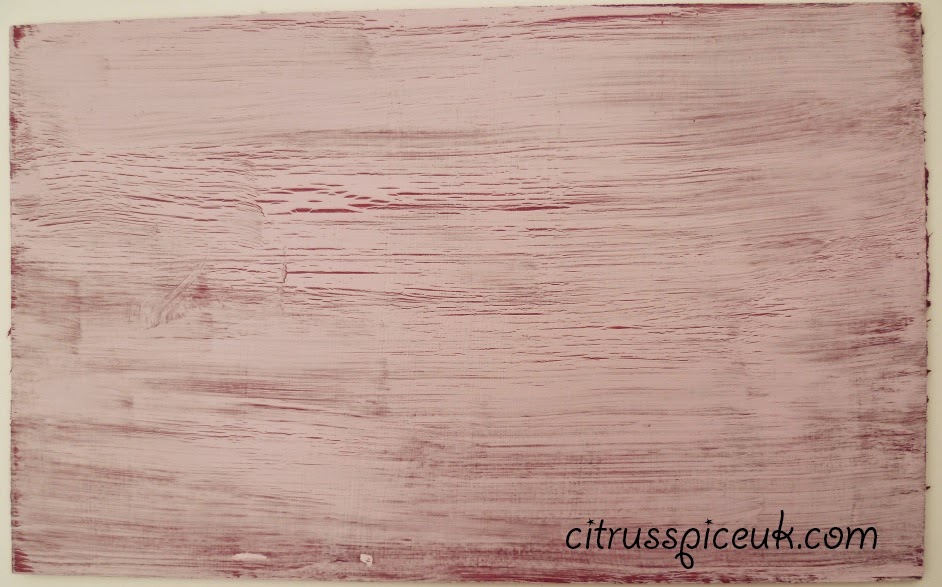
The pink board the cracking is finer as I had painted a thinner layer of glue and also painted it in vertical lines.There is a noticeable difference in both the finishes.
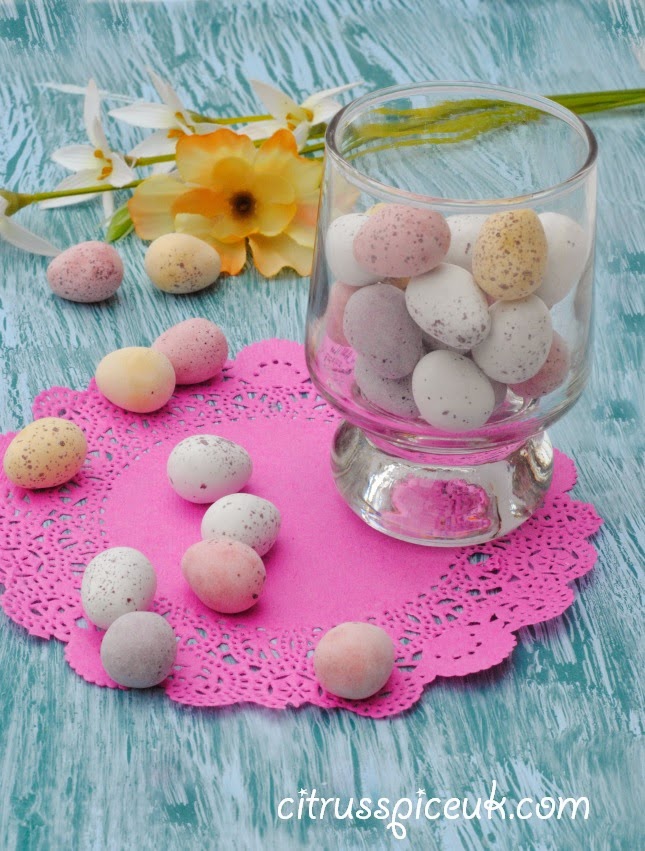
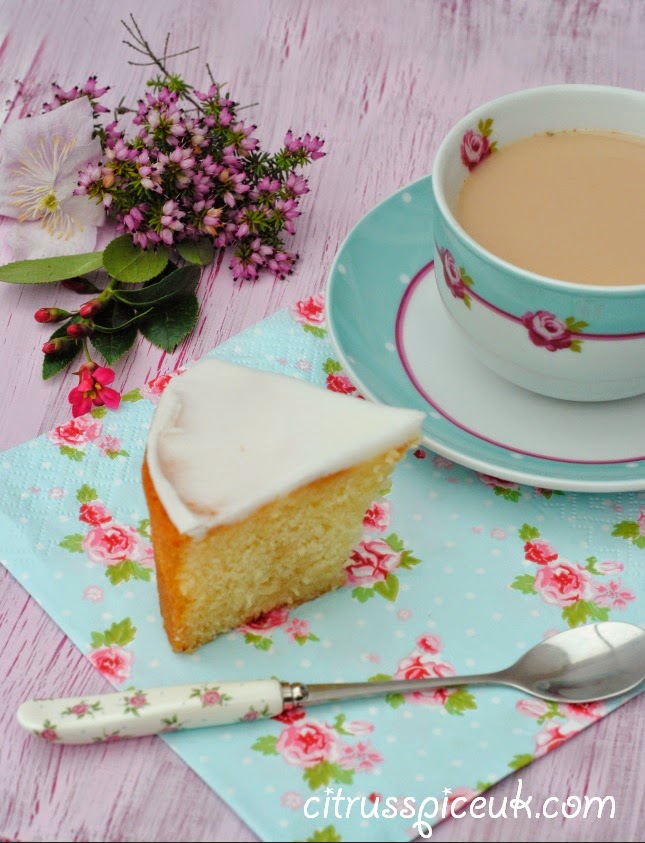
Here you can see the finished boards in my food photos.


Agata Pokutycka
OMG this is a brilliant idea! Off to get some over a weekend. Totally love it as I always struggle with a background.
Thank you so much for sharing it!
citrusspiceuk@gmail.com
Agata happy painting.
I have seen this style of backdrop on many photographs. Thanks for sharing how to make it. Who does that on these food blogs? Thanks again 😀 ~ Bhaktin Christina
Unknown
usually they look pretty crap, but how you've displayed them makes them look so good, looks like the barry m nail crackle effect haha xx
citrusspiceuk@gmail.com
Maybe I could use the crackle paints from the nail varnish next time.
Unknown
they make a great photo backdrop! I love using that technique 🙂
citrusspiceuk@gmail.com
Thanks Polly, I really like them for the texture they create.
Louisa
Brilliant idea to make your own props. Your photos look amazing against the wood, it adds another dimension.
citrusspiceuk@gmail.com
Thankyou Louisa
Twinsplustwo – Emma-Kate Thompson
BRILLIANT!!!! This is JUST what I am looking for as I strive to improve my Recipe Resource photos 🙂 THANK YOU!
citrusspiceuk@gmail.com
Great I hope you create some nice backgrounds too.
Stephs Two Girls
Beautiful! What a great idea for a project – and they give such great backgrounds!
Sylvia F.
What a brilliant idea Nayna! You're a very talented lady 😉 We should all come down to yours and learn some tips on DIY! 😉
citrusspiceuk@gmail.com
Sure Sylvia come round one day and we can have a blogging session.
Unknown
This is a fantastic tutorial, and such a great idea! Thank you for sharing!
Leeshastarr
These look pretty cool. Not really into cracked effects but they look nice. Plus no two will be the same which I find awesome.
bookworm
I enjoy looking at food photos that are done well. I love the way the blue board turned out! I think you are going to have a lot of fun with this. Alana
Corinne
This is fab! I love to present food on the wooden pizza boards that my housemates borrow from work but never returned when we had a wine and cheese night. Your food photos always look fab =)
Corinne x
http://www.skinnedcartree.com
citrusspiceuk@gmail.com
Thanks Corinne.
Hollie B
This is gorgeous! What a great and simple idea. I might give this a try. x
citrusspiceuk@gmail.com
Hollie I hope you do , you can use different colours to achieve a variety of boards.
Sarah Bailey
What a fantastic idea – I love how effective it looks! x
citrusspiceuk@gmail.com
Thanks Sarah.
Kara
These look fab!
Fiona
Oh wow, these do look beautiful as a backdrop to your food pictures 🙂
Fiona @ http://www.dollydowsie.com
citrusspiceuk@gmail.com
Thanks Fiona.
Globalmouse
What a brilliant idea – they make me think of summers by the sea! Lovely.
Ola
This is lovely, Great D.IY something I haven't ever thought about but will start doing more. Well done, it looks great xx
citrusspiceuk@gmail.com
Hope you do Ola.
Mammasaurus
This is so helpful! Thank you!
citrusspiceuk@gmail.com
Thanks.
Damson Lane
What a fantastic idea. I know that at Blogcamp one of the speakers recommended getting slate and off-cuts of wood from DIY stores and it is such a great idea, I just don't know where I would store them all!I use paper as I can roll it up but I love your paint boards.
citrusspiceuk@gmail.com
Thanks Damson, yes I was at blog camp at the same class. The slate idea is great.
Charly Dove
Oh wow these look fabulous, what a great idea. Great for food photography too I'd imagine!
Unknown
What a great idea.
Unknown
This is such a great idea, I have an old table that I didn't know what to do with and now I think I'm going to try this!
citrusspiceuk@gmail.com
Amy yes the finish can be applied to any wood project.
Barefoot Mahala
I can't believe how effective they look in the photos at the end. Such a simple idea and it looks beautiful!
citrusspiceuk@gmail.com
Thanks Mahala.
Michelle O
What a fab project for photo backgrounds! I'll have to dig out the paint and pva glue and give it a try some time! x
citrusspiceuk@gmail.com
Michelle I hope you have fun creating your boards.
Hannah Budding Smiles
These look amazing! My blog isn't big on the photography front yet because I'm not very confident, but tips like this will really help!xx
You Baby Me Mummy
Great technique. I love the pink one. I have some cute plates, but these would be lovely x
wild & grizzly
What a great idea, I can't wait to go on a hunt down a salvage yard and see if I can stock up on some background for photos x
Simplyfood
I hope you do Lori.
Mez Made Up
Ooooh this is so cool! I have the best image of you scouring through the old wood bits trying to contain your embarrassment. Good job!
mezmadeup.blogspot.co.uk
Simplyfood
I was rather embarrassed and when I need to go to that garden centre I try avoid eye contact with that assistant. lol
Ola
This is a great D.I.Y saves buying an expensive table from ikea 🙂
anna
I love it! I have to think about trying this
Tigerlilly Quinn
LOVE that effect, what a great DIY! x
Keri-Anne
What an amazing effect! I love the look of them as a background in a picture also 🙂 x
Kizzy
What a great idea I really need to make some of these for our pottery photos.
Mina Joshi
What a super idea. I know you spoke about doing this when we met and The finished product is amazing.
Helen @ Witty Hoots
What a fabulous idea – my best 'wall' for taking photographs happens to be in the darkest room – love the idea of a portable wall!
Karen S Booth
What a FAB idea Nayna, I have my own boards already painted, but will keep this for future projects! Karen
Heidi Roberts
Aren't you the clever one – what a great idea!
The Spicy Pear
Fantastic tips Nayna. I love your boards they look very rustic and stunning in your food photos. Am bookmarking for when I get my hands on some boards.
Louise
You have some truly amazing ideas 😀 I wish I had a creative streak!!
Louise x
Confessions of a Secret Shopper | An Undomestic Goddess
Bintu @ Recipes From A Pantry
I have just started experimenting with making my own backgrounds and this is a really useful tutorial Nayna. Thank you.
Shobha
Wish I could make some too.. I am trying to get some wooden planks .. but not succeeded as yet.
Shruti J
Lovely!!! Recently painted one 😀 This is quite a useful post for fellow bloggers 🙂
Triveni
I had been thinking on the same lines for a while. Will give it a shot !
Sonal@simplyvegetarian777
this is really lovely and look fun to do as well!
Arabella
The blue looks stunning, a nice effect that would also look good on an old summerhouse if you have one 🙂
Anne Dalzell
Some gorgeous photos in this article, between the cool floor boards and brilliant snaps, you're so creative
Copyright©2022 Nayna Kanabar/Citrusspice and Travels Powered by WordPress | Theme by TheBootstrapThemes
Cookie Consent